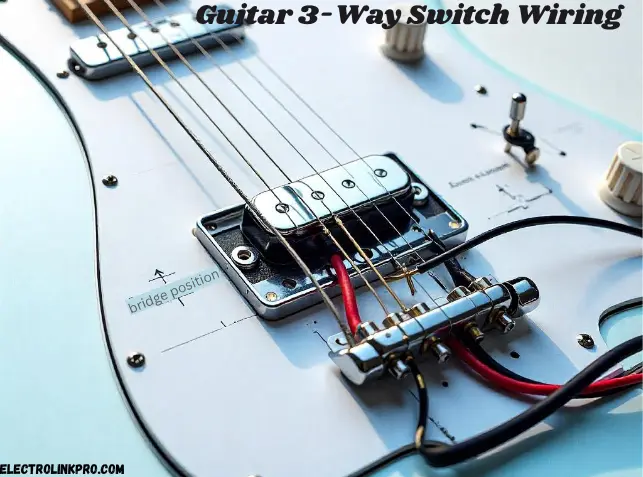
Wiring a guitar 3-way switch is essential for controlling pickups and shaping your instrument’s sound. Whether you’re upgrading, repairing, or customizing your guitar, understanding the guitar 3-way switch wiring diagram ensures optimal performance. This guide covers everything—from basic setups to advanced modifications—helping you achieve professional-grade tone control.
🔌 How a 3-Way Switch Works
- Position 1 (Neck Pickup) – Warm, smooth tones
- Position 2 (Both Pickups) – Balanced, full sound
- Position 3 (Bridge Pickup) – Bright, punchy output
📊 Guitar 3-Way Switch Wiring Configurations
| Wiring Type | Description | Best For |
|---|---|---|
| Standard Wiring | Connects neck and bridge pickups independently | Les Paul, SGs |
| Telecaster Wiring | Includes a dedicated tone control for the neck pickup | Fender Telecasters |
| Coil-Split Wiring | Allows humbuckers to switch to single-coil mode | Versatile mods |
| Out-of-Phase Wiring | Reverses pickup polarity for a thin, funky tone | Vintage-style setups |
Properly following a guitar 3-way switch wiring diagram ensures seamless switching and avoids electrical issues.
🛠 Step-by-Step Guitar 3-Way Switch Wiring Guide
Wiring a guitar 3-way switch correctly is crucial for smooth pickup selection and noise-free operation. Below is an expanded, detailed breakdown of the process, including tools, wiring steps, and troubleshooting tips.
🔧 Tools & Materials Needed
Before starting, gather these essential tools and components:
| Category | Item | Purpose/Notes |
|---|---|---|
| Essential Tools | Soldering Iron (25-40W) | Temperature-controlled to prevent overheating wires |
| Rosin-Core Solder (60/40) | Ensures strong, reliable connections | |
| Wire Strippers | Cleanly removes insulation without damaging conductors | |
| Needle-Nose Pliers | Helps bend and secure wires | |
| Multimeter | Tests continuity and verifies connections | |
| Required Components | 3-Way Toggle/Blade Switch | Must match guitar’s mounting style |
| Pickups (Humbuckers/Single-Coils) | Ensure compatibility with your guitar | |
| Shielding Tape (Optional) | Reduces electromagnetic interference (EMI) | |
| Heat-Shrink Tubing | Protects soldered joints from shorts |
This table presents the information in a clear, scannable format that makes it easy for readers to quickly identify what they need for their guitar wiring project. The three-column layout separates the categories, specific items, and their purposes/notes for optimal readability.
⚡ Wiring the 3-Way Switch (Detailed Steps)
Step 1: Identify Switch Terminals
Most 3-way switches have three lugs:
- Common (Output) Lug – Connects to the output jack.
- Neck Pickup Lug – Receives the neck pickup’s hot wire.
- Bridge Pickup Lug – Receives the bridge pickup’s hot wire.
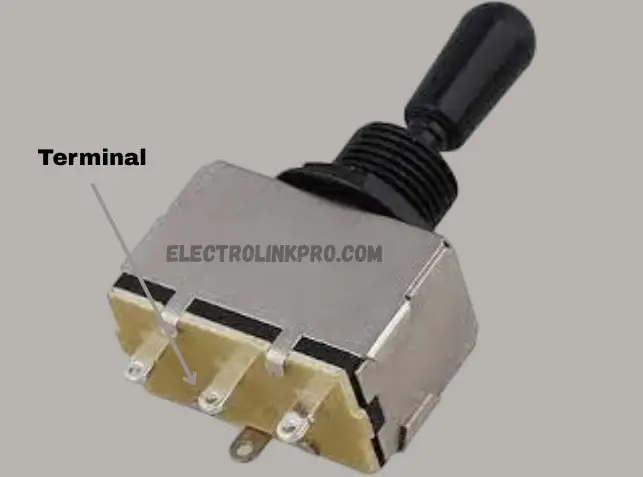
📌 Pro Tip: Use a multimeter in continuity mode to verify lugs before soldering.
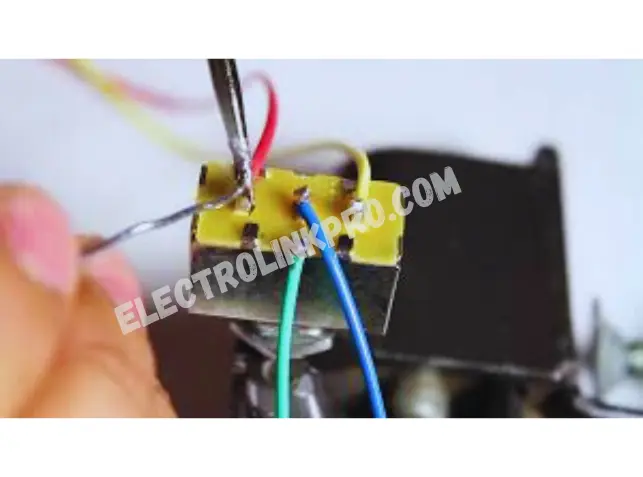
Step 2: Solder the Neck Pickup’s Hot Wire
- Strip ¼ inch of insulation from the neck pickup’s hot wire.
- Tin the wire with solder for easier attachment.
- Solder it to the neck pickup lug on the switch.
Step 3: Connect the Bridge Pickup’s Hot Wire
- Repeat the process for the bridge pickup’s hot wire.
- Solder it to the bridge pickup lug on the switch.
Step 4: Link the Common Terminal to the Output Jack
- Run a wire from the common lug to the output jack’s hot terminal.
- Ensure a solid solder joint to prevent signal loss.
Step 5: Ground All Components
- Connect all ground wires (pickup grounds, switch housing, output jack sleeve).
- Solder them to the back of a potentiometer or a dedicated ground point.
📌 Critical Check: Avoid ground loops—only one path should exist to ground.
🔍 Testing & Troubleshooting (In-Depth Solutions)
Issue 1: No Sound
✅ Possible Causes & Fixes:
- Cold Solder Joint – Reheat connections until solder flows smoothly.
- Loose Wire – Check all terminals for secure attachment.
- Faulty Switch – Test continuity with a multimeter.
Issue 2: Crackling or Intermittent Sound
✅ Possible Causes & Fixes:
- Dirty Switch Contacts – Spray contact cleaner and toggle the switch repeatedly.
- Oxidized Wiring – Replace corroded wires or re-solder connections.
Issue 3: Incorrect Pickup Selection
✅ Possible Causes & Fixes:
- Miswired Switch – Verify against a guitar 3-way switch wiring diagram.
- Reversed Neck/Bridge Wires – Swap connections if the wrong pickup activates.
🎸 Final Setup & Playtesting
- Secure all wires with zip ties to prevent rattling.
- Test each switch position for proper pickup engagement.
- Check for hum/buzz—if present, revisit grounding.
📢 Pro Tip: Use shielded cable for output wiring to minimize noise.
🎛 Advanced Modifications for Guitar 3-Way Switch Wiring
1. Coil-Splitting Humbuckers
- Converts a humbucker to single-coil for brighter tones.
- Requires a push-pull pot or additional switch.
2. Series/Parallel Switching
- Series: Thicker, louder output (default for humbuckers).
- Parallel: Cleaner, Strat-like tones.
3. Adding a Killswitch
- Cuts signal instantly for stutter effects.
- Works by shorting the output to ground.
4. Out-of-Phase Wiring
- Creates a hollow, quacky sound (popular in vintage guitars).
🎸 Best Guitars Using a 3-Way Switch
| Guitar Model | Pickup Configuration | Tonal Characteristics |
|---|---|---|
| Gibson Les Paul | Dual Humbuckers | Thick, sustain-rich rock tones |
| Fender Telecaster | Single-Coils | Bright, twangy country sounds |
| PRS Custom 24 | Humbuckers (coil-split) | Versatile rock & jazz tones |
🎸 Conclusion:
Understanding how to wire a 3-way switch is essential for customizing your guitar’s tone and ensuring reliable performance. Whether you’re upgrading pickups, troubleshooting crackling sounds, or experimenting with coil-splitting, a proper guitar 3-way switch wiring diagram is your roadmap to success.
For even deeper insights into guitar electronics, check out StewMac’s expert guide on Switchcraft 3-way toggle switches. Their tutorials cover professional wiring techniques, pickup configurations, and essential maintenance tips.
Now that you’ve got the knowledge—grab your soldering iron, follow the diagrams, and unleash your guitar’s full potential!
🔌 Need help? Drop your wiring questions below—we’ll help you troubleshoot! 🎶
❓ Frequently Asked Questions (FAQs)
1. What does a 3-way switch do on a guitar?
A guitar 3-way switch selects between neck, bridge, or both pickups for different tonal options.
2. Can I wire a 3-way switch for single-coil pickups?
Yes! The guitar 3-way switch wiring diagram works for both humbuckers and single-coils.
3. Why is my 3-way switch crackling?
Dirt or oxidation causes crackling—clean the switch with contact cleaner.
4. How do I reverse pickup polarity in a 3-way switch?
Swap the hot and ground wires on one pickup for an out-of-phase sound.
5. Can I add a killswitch to my 3-way wiring?
Yes! Wire a momentary switch between the output and ground for instant muting.
By mastering the guitar 3-way switch wiring diagram, you’ll optimize your guitar’s performance and explore new sonic landscapes. �🔧🎶