Installing a 3-way switch wiring diagram correctly ensures seamless control of lights from two locations. Whether you’re upgrading your home lighting or troubleshooting an existing setup, this guide covers everything—from wiring basics to advanced configurations.
By the end, you’ll master 3-way switch wiring diagrams, understand terminal connections, and avoid common mistakes. Let’s dive in!
📌 3-Way Switch Wiring Diagram Basics
A 3-way switch wiring diagram allows control of a single light fixture from two switches. Unlike standard switches, 3-way switches use three terminals:
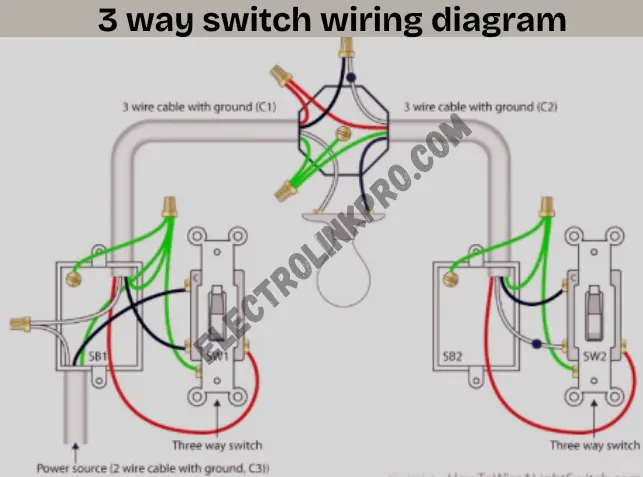
✅ Common (COM) – Connects to the power source or light.
✅ Traveler Terminals – Two brass screws that link switches.
🔧 Tools & Materials Needed
⚡ How a 3-Way Switch Works
- Power flows from the first switch’s common terminal to the second via traveler wires.
- The second switch’s common terminal connects to the light.
- Flipping either switch toggles the circuit.
🛠 Step-by-Step 3-Way Switch Wiring Diagram Setup
1️⃣ Power Off & Prepare Wires
- Turn off the circuit breaker.
- Strip ¾-inch insulation from wires.
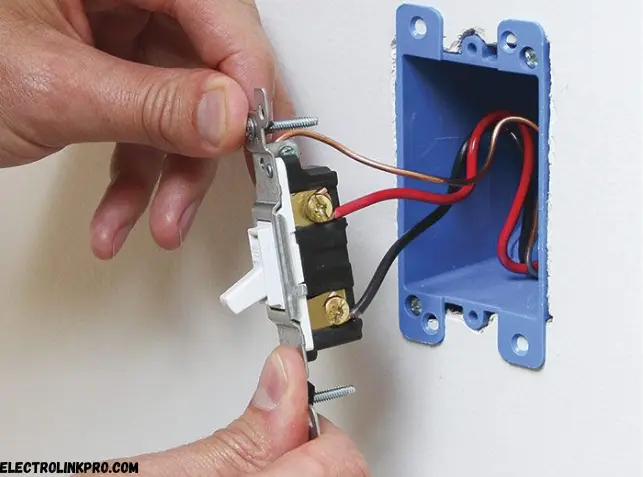
2️⃣ Connect First Switch
| Wire Color | Terminal |
|---|---|
| Black (Hot) | Common (COM) |
| Red & Brass | Travelers |
| White (Neutral) | Wire Nut (Pigtail if needed) |
3️⃣ Run Cable Between Switches
- Use 14/3 or 12/3 cable for traveler connections.
- Connect red & black wires to traveler terminals.
4️⃣ Wire Second Switch to Light
| Wire Color | Terminal |
|---|---|
| Black (Hot) | Common (COM) |
| Red & Brass | Travelers |
| White (Neutral) | Light Fixture |
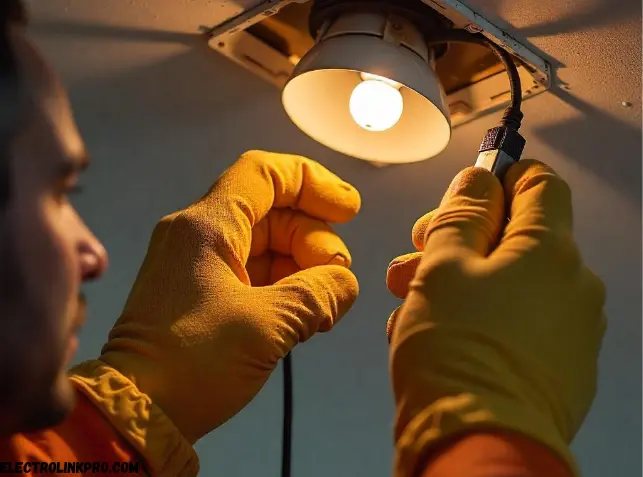
5️⃣ Test the Circuit
- Restore power and toggle switches to verify functionality.
🔍 Common 3-Way Switch Wiring Diagram Mistakes
❌ Reversed Traveler Wires – Causes switches to malfunction.
❌ Incorrect Common Terminal Connection – Prevents the light from turning on.
❌ Skipping Grounding – Creates a safety hazard.
Pro Tip: Label wires before disconnecting old switches!
🔄 Alternative 3-Way Switch Wiring Diagrams
1. Power at Light Fixture
- Hot wire connects to the light first.
- Switches control the circuit via travelers.
2. Power at Switch Box
- Hot wire feeds into the first switch.
- More common in modern installations.
3. Multiple Lights with 3-Way Switches
- Extend wiring by daisy-chaining fixtures.
🏆 Best Practices for 3-Way Switch Wiring Diagrams
✔ Use a Voltage Tester – Avoid shocks.
✔ Follow NEC Code – Proper grounding is mandatory.
✔ Document Wiring – Helps future troubleshooting.
🏁 Conclusion:
Installing a 3-way switch wiring diagram may seem complex at first, but with the right guidance, it becomes a straightforward and rewarding project. By following this comprehensive guide, you’ve learned:
🔹 Key Takeaways
✅ How 3-Way Switches Work – Unlike single-pole switches, 3-way switches use two traveler wires and a common terminal to control a light from two locations.
✅ Correct Wiring Configurations – Whether power enters at the switch or the light fixture, proper connections ensure seamless operation.
✅ Essential Tools & Safety – Always use a voltage tester, follow NEC codes, and properly ground all connections.
✅ Troubleshooting Tips – Reversed travelers or incorrect common terminal wiring are common issues—labeling wires prevents mistakes.
🔹 Why Proper Wiring Matters
A correctly installed 3-way switch wiring diagram enhances convenience and safety. Whether in hallways, staircases, or large rooms, dual control improves functionality while adhering to electrical standards.
❓ FAQs: 3-Way Switch Wiring Diagram
1. What’s the difference between a 3-way and 4-way switch?
A 3-way switch wiring diagram uses two switches, while a 4-way adds extra switches for more control points.
2. Can I use a dimmer with a 3-way switch?
Yes, but ensure the dimmer is 3-way compatible.
3. Why does my 3-way switch only work one way?
Check traveler wire connections—they might be reversed.
4. Can I install a 3-way switch without a neutral?
No, modern setups require a neutral for safety.
5. What wire colors are used in 3-way switches?
- Black (Hot), Red & White (Travelers), Green/Bare (Ground).