Installing or wiring a 3-way switch can seem daunting, but with the right guidance, it’s a straightforward DIY task! Whether you’re upgrading your home lighting or fixing a faulty switch, this guide covers everything you need—from tools to step-by-step wiring instructions.
By the end, you’ll master wiring a 3-way switch safely and efficiently. Let’s dive in! ⚡
Tools and materials you needed:
Here is below a table of tools that you needed for wiring a 3 way switch
🔌 3-Way Switch Wiring Basics
Key Components
- Common Terminal (Black Screw) → Connects to power source or light
- Traveler Terminals (Brass Screws) → Interconnects both switches (usually red & black wires)
- Ground Terminal (Green Screw) → Safety grounding
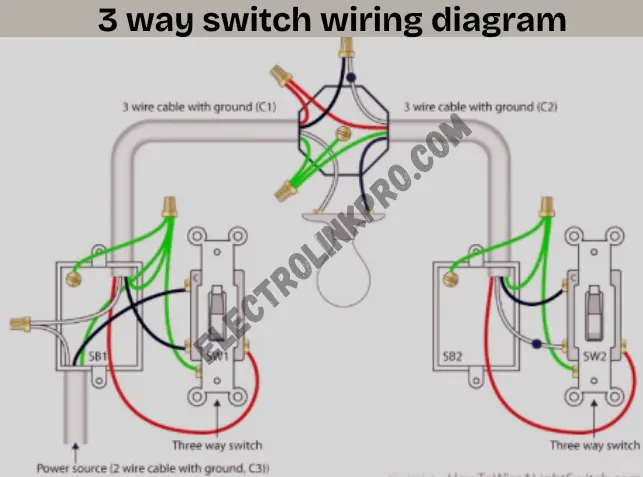
Standard Wiring Configurations
| Setup | Description |
|---|---|
| Power at First Switch | Hot wire enters initial switch |
| Power at Light Fixture | Hot wire connects to light first |
| Power at Second Switch | Hot wire enters secondary switch |
🔹 Pro Tip: Traveler wires must connect to brass screws for proper operation.
🔧 Step-by-Step Installation
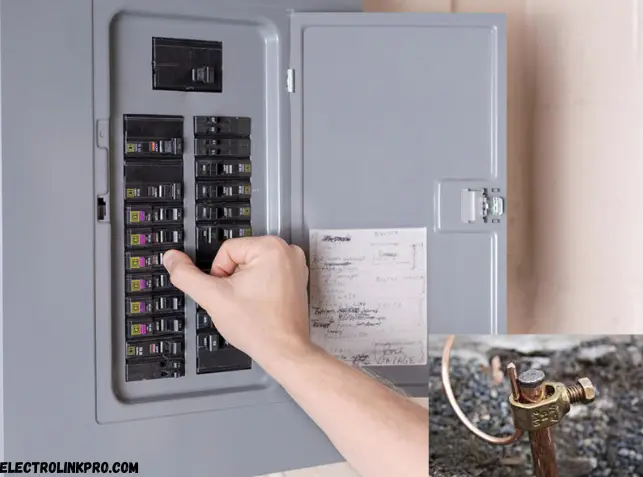
1. Power Off & Prep
- Turn off circuit breaker
- Verify no voltage with tester
2. Identify Wires
- Common wire → Black screw
- Travelers → Brass screws (red & black)
- Ground → Green screw
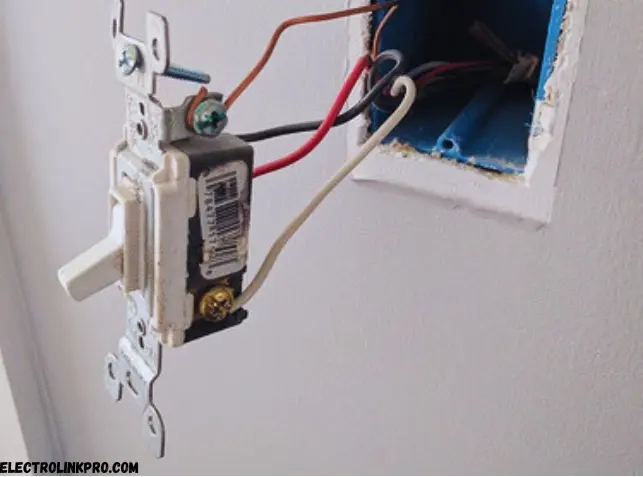
3. Wire First Switch
- Connect hot wire to common terminal
- Attach travelers to brass screws
- Secure ground wire
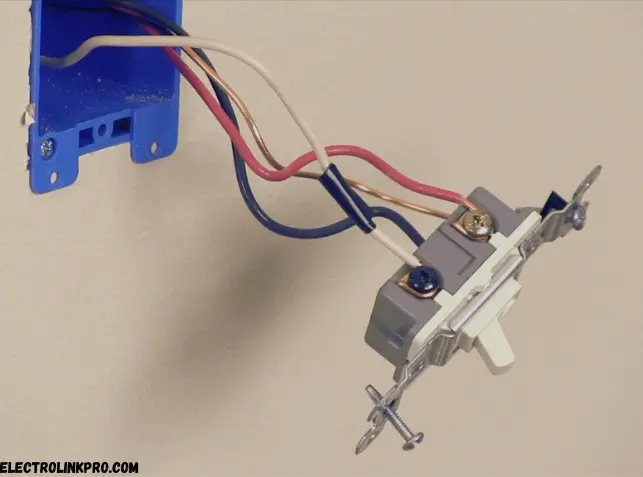
4. Wire Second Switch
- Link travelers to brass screws
- Connect common terminal to light
5. Test Operation
- Restore power
- Toggle switches to verify functionality
⚠️ Common Mistakes & Fixes
| Mistake | Solution |
|---|---|
| Swapped traveler/common wires | Recheck black screw connections |
| Loose wire connections | Tighten all terminals |
| Missing ground | Always connect green/bare wire |
| Wrong cable type | Use 14/3 or 12/3 NM cable |
🔹 Troubleshooting Tip: If lights don’t work, travelers are most likely miswired!

🔄 Alternative Wiring Methods
Smart 3-Way Switches
- Replace one switch with a smart switch for app/voice control
Power-Through Wiring
- Routes hot wire through light fixture first
- Reduces cable runs in some installations
Conclusion: Master 3-Way Switch Wiring with Confidence
Wiring a 3-way switch may seem complex at first, but with the right tools, diagrams, and step-by-step instructions, you can complete the job safely and efficiently. This guide has covered:
✅ Essential tools and materials
✅ Wiring configurations (power at switch vs. light)
✅ Step-by-step installation
✅ Troubleshooting common mistakes
✅ Alternative setups (smart switches, power-through wiring)
By following these best practices, you’ll have full control over your lighting from multiple locations.
Need More Help? Check Out These Resources:
🔗 National Electrical Code (NEC) Guidelines – Official safety standards
🔗 How to Use a Voltage Tester (Video) – Visual safety demo
🔗 Smart 3-Way Switch Options – Upgrade to voice/app control
Ready to tackle your next electrical project? Bookmark this guide for reference, and always prioritize safety by double-checking connections before restoring power.
❓ FAQs
1. Can I use regular switches instead of 3-way?
→ No, standard switches won’t allow multi-location control.
2. Why do my lights flicker after installation?
→ Check for loose traveler wire connections.
3. How do I identify the common wire?
→ It connects to the black screw terminal.
4. Can I add a dimmer to a 3-way circuit?
→ Yes, but use only one 3-way dimmer (companion switches available).
5. 14/2 vs 14/3 cable – which do I need?
→ 14/3 (with red traveler) is required for 3-way switches.
This optimized guide gives you all the details for successful 3-way switch wiring in a clear, actionable format. 🛠️⚡