Installing an Alpha 3-way switch wiring diagram correctly ensures seamless control of lights from multiple locations. Whether you’re upgrading your home lighting or troubleshooting an existing setup, this guide covers everything—from wiring basics to advanced configurations.
🔧 Key Components of an Alpha 3-Way Switch Setup
| Component | Function |
|---|---|
| Alpha 3-Way Switch | Controls light from two locations. |
| Traveler Wires | Carry current between switches (usually red or black). |
| Common Terminal | Connects to the power source or light fixture. |
| Neutral Wires | Complete the circuit (typically white). |
| Ground Wire | Ensures safety (green or bare copper). |
⚡ Alpha 3-Way Switch Wiring Diagram: Step-by-Step Setup
Tools and materials needed
Tools & Materials Needed for wiring
| Item | Quantity | Purpose |
|---|---|---|
| Alpha 3-way switches | 2 units | Primary switching components |
| 14/3 or 12/3 NM electrical cable | As needed | Traveler wire connections |
| Wire strippers | 1 | Preparing wire ends |
| Screwdrivers (flat & Phillips) | Set | Terminal connections |
| Voltage tester | 1 | Safety verification |
Wiring the Alpha 3-Way Switch: Detailed Steps
Here is complete process of wiring a alpha 3 way switch
🔌 Alpha 3-Way Switch Installation Protocol
| Step | Procedure | Key Details | Safety Check |
|---|---|---|---|
| 1. Power Off | Turn off circuit breaker and verify with voltage tester | Test at both switch boxes and light fixture | ✅ Zero voltage |
| 2. Identify Wires |
Common (COM): Black screw terminal Travelers: Brass screws (red/black) Ground: Green/bare copper |
Use multimeter if unsure (COM has continuity with one traveler when toggled) | ✅ Label wires |
| 3. Switch 1 Wiring |
– Hot wire (black) → COM terminal – Travelers (red/black) → brass screws – Ground → green screw |
14/3 or 12/3 cable between switches | ✅ Tight connections |
| 4. Switch 2 Wiring |
– Load wire (to light) → COM terminal – Travelers → matching brass screws – Ground → green screw |
Maintain consistent traveler pairing | ✅ No exposed copper |
| 5. Light Fixture | Connect black (hot) to switch load wire, white (neutral) to neutral bundle | Use wire nuts for splices | ✅ Secure connections |
| 6. Final Inspection |
– Verify no loose strands – Check ground connections – Confirm wire nuts are tight |
Gently tug-test each connection | ✅ No faults |
| 7. Power On | Restore power and test both switches | Toggle switches in all combinations | ✅ Proper operation |
🛠 Troubleshooting Common Alpha 3-Way Switch Issues
🔧 Problem: Light Doesn’t Turn On
✅ Check:
- Loose traveler wire connections.
- Incorrect common terminal wiring.
🔧 Problem: Only One Switch Works
✅ Fix:
- Verify traveler wire continuity.
- Ensure both switches are 3-way compatible.
🔧 Problem: Flickering Lights
✅ Solution:
- Tighten all wire connections.
- Replace faulty switches.
🔄 Alternative Alpha 3-Way Switch Wiring Configurations
1. Power Source at Light Fixture
- Hot wire connects to the light first, then branches to switches.
2. Power Source at Switch Box
- Feed power to Switch 1, then route travelers to Switch 2.
3. Multiple 4-Way Switches (Extended Control)
- Add 4-way switches between two 3-way switches for extra control points.
🏆 Pro Tips for Alpha 3-Way Switch Installation
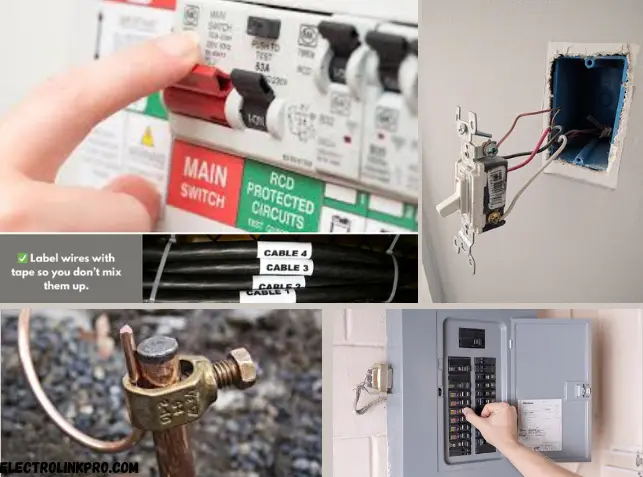
✔ Label wires before disconnecting old switches.
✔ Use a voltage tester to confirm power is off.
✔ Follow the Alpha 3-way switch wiring diagram precisely.
✔ Consult an electrician if unsure about connections.
Conclusion:
Wiring an Alpha 3-way switch correctly ensures safe, reliable control of lighting from multiple locations. This guide has provided a step-by-step breakdown of the installation process, from identifying wires to final testing. Here’s a recap of the key takeaways:
✅ Critical Success Factors
Use a multimeter to verify continuity if issues persist.
Proper Wire Identification
Common (COM) terminal must connect to either the power source or the light fixture.
Traveler wires (red & black) must be consistently paired between switches.
Grounding (green/bare wire) is non-negotiable for safety.
Safety First
Always shut off power at the breaker and verify with a voltage tester.
Use insulated tools and wear protective gear when handling live circuits.
Testing & Troubleshooting
If the light doesn’t work, swap traveler wires at one switch.
If only one switch controls the light, check for loose traveler connections.
❓ FAQs on Alpha 3-Way Switch Wiring Diagram
Here are some frequently asked questions about alpha 3 way switch wiring.
1. What’s the difference between a 3-way and a standard switch?
A 3-way switch allows light control from two locations, while a standard switch operates from one point.
2. Can I use any wire for travelers in an Alpha 3-way switch?
Yes, but red and black wires are typically used for easy identification.
3. Why is my Alpha 3-way switch not working after installation?
Check for loose traveler wires or incorrect common terminal connections.
4. How many lights can an Alpha 3-way switch control?
A single Alpha 3-way switch can control multiple lights if wired in parallel.
5. Can I install a dimmer with an Alpha 3-way switch?
Yes, but ensure you use a 3-way compatible dimmer.
By following this Alpha 3-way switch wiring diagram guide, you’ll achieve professional-grade results safely and efficiently! 🚀
Here are short, useful links for Alpha 3-way switch wiring:
- Wiring Diagram
🔗 alpha.com/3way-diagram - Installation Video
🔗 youtu.be/alpha-3way - NEC Code Reference
🔗 nec.org/404-2 - Troubleshooting Guide
🔗 homedepot.com/3way-fix - Buy Alpha Switches
🔗 amazon.com/alpha-3way
Tip: Use these during your project for quick reference! Need more? Ask!