Proper 3-way switch wiring is essential for controlling lights from two different locations—whether it’s for staircases, hallways, or large rooms. This guide covers 3-way switch wiring in full depth, ensuring safety, efficiency, and compliance with electrical standards.
🛠 Understanding 3-Way Switch Wiring Basics
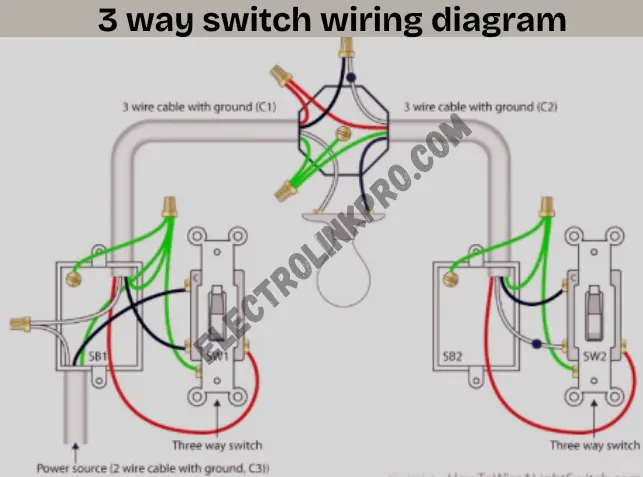
A 3-way switch wiring setup allows you to control a single light fixture from two separate switches. Unlike a standard single-pole switch, a 3-way switch wiring system uses three terminals:
- Common terminal (COM) – Connects to the power source or light fixture.
- Traveler terminals (T1 & T2) – Carry current between switches.
🔧 Key Components of 3-Way Switch Wiring
| Component | Function |
|---|---|
| 3-Way Switches | Two switches control one light. |
| 14/3 or 12/3 NM Cable | Contains black (hot), red (traveler), white (neutral), and ground wires. |
| Light Fixture | The endpoint controlled by the switches. |
| Electrical Boxes | Houses switches and connections securely. |
⚡ How 3-Way Switch Wiring Works
- Power Source to First Switch – The hot wire (black) connects to the COM terminal.
- Traveler Wires Between Switches – Red and black wires link the two switches.
- Second Switch to Light – The COM terminal connects to the light fixture.
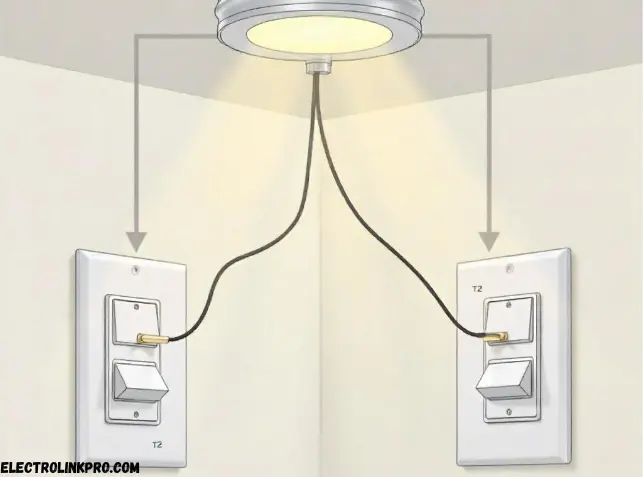
Wiring Diagram For a 3-way switch wiring
Here is complete wiring diagram for a 3-way switch
🔌 Step-by-Step 3-Way Switch Wiring Installation
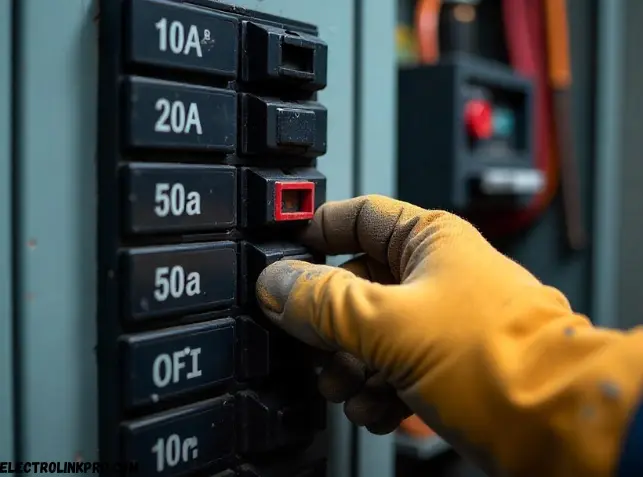
1️⃣ Turn Off Power & Prepare Wiring
- Shut off the circuit breaker.
- Verify power is off using a voltage tester.
- Run 14/3 or 12/3 NM cable between switches and light.
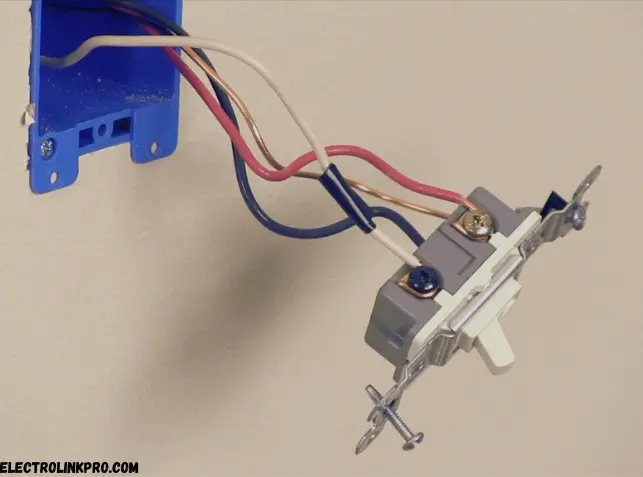
2️⃣ Wire the First 3-Way Switch
- Connect the black (hot) wire to the COM terminal.
- Attach red and black traveler wires to T1 & T2.
- Secure the ground wire to the green screw.
3️⃣ Wire the Second 3-Way Switch
- Link the traveler wires (red & black) to T1 & T2.
- Connect the black wire from the light to the COM terminal.
- Ground the switch properly.
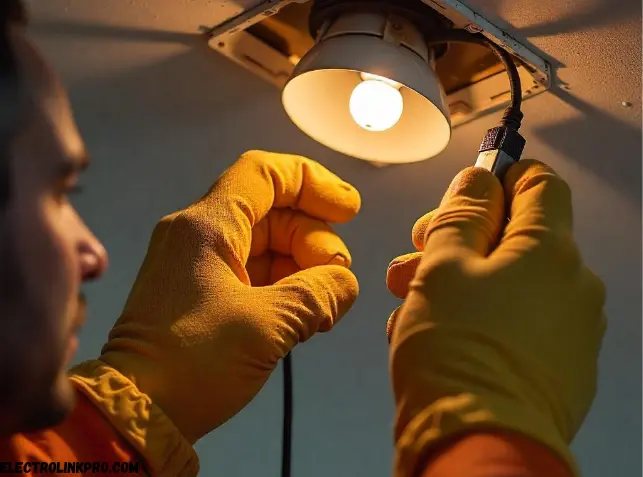
4️⃣ Connect the Light Fixture
- Join the black wire (from switch 2) to the light’s hot terminal.
- Connect the neutral (white) wires together.
- Secure the ground wire to the fixture.
5️⃣ Test the 3-Way Switch Wiring
- Restore power and toggle both switches.
- The light should turn on/off from either location.
⚠️ Common 3-Way Switch Wiring Mistakes & Fixes
| Mistake | Solution |
|---|---|
| Incorrect traveler wire connections | Ensure red & black wires are on T1 & T2, not COM. |
| Mixed-up hot and neutral wires | Verify black (hot) connects to COM, white (neutral) stays grouped. |
| Loose ground connections | Tighten all ground screws for safety. |
| Using 2-wire instead of 3-wire cable | Always use 14/3 or 12/3 cable for travelers. |
🔍 Advanced 3-Way Switch Wiring Configurations
🔹 Multiple 4-Way Switches in Between
- Adding a 4-way switch allows control from 3+ locations.
- Connect travelers in sequence between 3-way and 4-way switches.
🔹 Smart 3-Way Switch Wiring
- Replace one 3-way switch with a smart switch (e.g., Lutron, TP-Link).
- Follow manufacturer wiring diagrams for compatibility.
🔹 Power-Through-Light Wiring
- If power enters at the light fixture:
- Connect hot to the light first.
- Run 3-wire cable to both switches.
✅ Why Proper 3-Way Switch Wiring Matters
- Safety – Prevents short circuits and electrical fires.
- Convenience – Control lights from multiple entry points.
- Energy Efficiency – Avoids leaving lights on unnecessarily.
🏁 Conclusion:
Installing and troubleshooting 3-way switch wiring is a fundamental skill for homeowners, electricians, and DIY enthusiasts. Proper wiring ensures safe, efficient, and flexible lighting control from multiple locations—whether for staircases, hallways, or large rooms.
🔑 Key Takeaways from This Guide
✔ 3-way switches require three terminals (COM, T1, T2) and 14/3 or 12/3 NM cable for correct traveler wire connections.
✔ Power source routing (whether at the first switch, second switch, or light fixture) determines wiring configuration.
✔ Testing with a voltage tester before installation prevents electrical hazards and ensures proper connections.
✔ Common mistakes (wrong traveler wire connections, loose grounds, or incorrect COM terminal wiring) can lead to malfunctioning circuits.
✔ Advanced setups (like adding 4-way switches or smart switches) expand control options but require precise wiring.
⚡ Safety First: Why Proper Wiring Matters
- Prevents electrical fires caused by short circuits or loose connections.
- Ensures compliance with NEC (National Electrical Code) for legal and insurance purposes.
- Enhances convenience by allowing light control from multiple entry points.
🛠 When to Call a Professional
While 3-way switch wiring is manageable for experienced DIYers, complex setups (like integrating smart switches or troubleshooting faulty circuits) may require a licensed electrician. If you encounter:
Unidentifiable wiring in older homes
…it’s best to consult an expert.
Flickering lights despite correct wiring
Tripped breakers after installation
🔧 Ready to upgrade your lighting? Follow this guide for flawless 3-way switch wiring!
❓ FAQs About 3-Way Switch Wiring
1. Can I use a dimmer in a 3-way switch setup?
Yes, but only one switch should be a dimmer—the other must remain a standard 3-way switch.
2. What’s the difference between 3-way and 4-way switches?
A 3-way switch wiring controls lights from two locations, while a 4-way switch adds more control points.
3. Why is my 3-way switch not working?
Check for loose traveler wires, incorrect COM connections, or a tripped breaker.
4. Can I use 14/2 cable for 3-way switches?
No, 3-way switch wiring requires 14/3 or 12/3 cable for traveler wires.
5. How do I identify the COM terminal?
It’s usually darker (black or brass-colored) and labeled “COM” or “Common.”
Some official Useful links
🔧 Electrical Codes & Safety
- NFPA 70 (NEC) – www.nfpa.org/codes (National Electrical Code)
- OSHA Electrical Standards – www.osha.gov (Workplace Safety)
⚡ Manufacturer Wiring Guides
- Lutron 3-Way Wiring – www.lutron.com (Smart Switches)
- Leviton Installation Guides – www.leviton.com (Standard Switches)
📚 DIY & Troubleshooting
- Home Depot Wiring Guide – www.homedepot.com (Step-by-Step Tutorials)
- This Old House Electrical – www.thisoldhouse.com (Video Tutorials)